The Ultimate Guide To Half Dome
Half Dome has come a long way, from being declared as a summit that no one would ever reach, to one of the most popular trails in one of the most popular national park in the country. While there are tons of resources out there, this guide was written because all the other resources require you to read through paragraphs of dense text. We wanted to give you step-by-step instructions, side-by-side comparing of route options, and the handy map above to help with planning!
This guide is divided into 3 sections:
- Permits (options & instructions)
- Route planning (options & photos)
- Hike preparation (physical fitness, hazards, & gear list)

Why are there permits at all?
The Half Dome trail became so popular that concerns of traffic, a positive “wilderness” experience, and environmental degradation necessitated the Half Dome Plan. The Plan cuts traffic from 1000+ hikers to 300 hikers per day allowed up the cabled stretch to the summit of Half Dome.
- 225 permits go to day trippers (via the lotteries)
- 50 go to advanced wilderness permit applicants
- 25 go to first come first serve wilderness permit applicants
Note that permits are only required for the summer season, some time from May to October (depending on conditions). During the off-season months, the cables are down (meaning the poles that hole them up to waist height are down, the cables themselves lie flat on the granite) and it is not officially recommended to hike the trail, though it can be done, and you will not need any permits.
Step-by-step instructions for permits
| For day-trip lotteries (pre- or in-season): | For wilderness permits (advanced reservation or first come first serve): | |
|---|---|---|
| When to apply |
|
|
| How to apply |
|
First come first serve applies in person at the Wilderness Permit Office nearest the entry trailhead if available for your given timeframe. Rules have changed since COVID and given the popularity of the trail, check this page for more info |
| Costs to apply | $8 per person + reservation fee ($6.50 by phone, $4.50 online) | $8 per person + wilderness permit reservation fee ($5 per person & $5 per application; or waived if done in person, e.g., first come first serve) |
| Notes |
|
|
Editorial comments:
We live in an increasingly spontaneous world. The entire reason the in-season daily lotteries exist is because after the 225 pre-season lottery permits are distributed, people inevitably cancel, such that ~50 permits are available per day in the in-season lottery. Given that, I think the best strategy is the in-season lottery.
On another note, if you're looking for less scrupulous methods of getting a permit, check out Craigslist or Meetup groups, folks often will post extra openings in their group (you'll have to meetup with their trip leader at the permit checkpoint). Or, if you're really feeling lucky, just hike up to sub dome (end of Segment I on the map above) and wait. The view will be nice regardless. On my last trip, all 6 people (3 groups of 2) I passed looking for extra permits at sub dome got up to the summit.

Literally each & every segment of the route options leading up to Half Dome are diagrammed on the map above, and also in the chart below (for easier side-by-side comparison). Note that when folks (including us) say take the Mist Trail up, they mean take Segments B, C, G up. When people say take the John Muir Trail up, they mean Segments B, D, F up.
| Segment | Distance | Elevation gain | Elevation gain over distance | Difficulty | Difficulty notes |
|---|---|---|---|---|---|
| 0.4 mi 0.6 km |
0 ft 0 m |
0 ft/mi 0 m/km |
Easy | Completely flat. This segment can be cut if you start after the shuttle service begins at 7am | |
| 1.1 mi, 1.8 km | 550 ft 187 m |
500 ft/mi 106 m/km |
Easy | Fully paved, wide path. Note that the junction is after you cross the footbridge | |
| 0.6 mi, 1.0 km | 400 ft 136 m |
667 ft/mi 141 m/km |
Strenuous | Last bit of Mist Trail takes you up giant (though well-paved) steps in a misty/ wet environment. Note that the junction is further up past the fall. In winter, this segment is closed | |
| 1.4 mi, 2.3 km | 850 ft 289 m |
607 ft/mi 128 m/km |
Moderate | Instead of the giant steps along the Mist Trail, more switchbacks make the climb along the John Muir Trail much easier | |
| 0.5 mi, 0.8 km | 450 ft 153 m |
900 ft/mi 190 m/km |
Moderate | There's a lot of elevation to be covered here if you go from Mist Trail up to Clark's Point. Note however, that this trail is more commonly used as a down route, as Segments C and F close in the winter | |
| 1.6 mi, 2.6 km | 550 ft 187 m |
344 ft/mi 73 m/km |
Easy | Consistent but gradual elevation gain. In winter, this segment is closed. Note that the next junction is beyond the fall going up | |
| 1.2 mi, 1.9 km | 1000 ft 340 m |
833 ft/mi 176 m/km |
Strenuous | While you never cross the top of Nevada Fall as with Segment F, this trial takes you up rapid switchbacks on loose, rocky steps right next to the fall from the bottom to the top. Note that the next junction is beyond your last glimpse of the fall | |
| 1.2 mi, 1.9 km | 150 ft 51 m |
125 ft/mi 26 m/km |
Easy | This is the break before the calm (for the day-trippers anyway). Minimal elevation gain and a wide well-trodden path take you to the Little Yosemite Valley Camp | |
| 2.9 mi, 4.7 km | 1800 ft 612 m |
621 ft/mi 131 m/km |
Strenuous | The longest unbroken segment you'll do, with a consistently high amount of elevation gain at every step. Thank goodness for switchbacks! I personally felt this was much more tiring than the cables | |
| 0.2 mi, 0.3 km | 900 ft 306 m |
4500 ft/mi 951 m/km |
Strenuous | The ranger at the checkpoint validates your permit (trip leader must have identification) both on your way up and on your way down. Beyond the checkpoint, the first 500 ft/ 150 m consists of rapid switchback on steep granite steps; the last 400 ft/ 120 m are the infamous cables |
Our recommended route
The route is essentially the same for both day-trippers and backpackers: going up the John Muir Trail for sunrise or sunset views of the mountains, and then coming down the Mist Trail for a shorter (albeit steeper) finish when you’re tired. Our recommendation allows you to see all the major sights along both trails. Unique advantages for backpackers:
- Watch sunrise at the Half Dome summit
- Very limited crowds (you will be at the summit for sunrise, and do most of your hiking in the late afternoon or early morning)
- The option to shave off Segment A entirely and take the free Valley shuttle to and from the Happy Isles trailhead at shuttle stop 16 (shuttle starts at 7am)
The major potential downside to our recommended route, depending on your preference, is that the descent includes the steep steps of the Mist Trail. Though by going down the populated Mist Trail in the afternoon, you'll meet many other hikers who may be friendly & willing to help if you need more supplies.
| Segment description | Day-trippers | Backpacker |
|---|---|---|
| 16.4mi/ 26.4km | 11-12hrs | 13.5-15.5hrs |
| Park at the trailhead parking, and take Segment A to Segment B | 5am (day of) | 4pm (day before) |
| At the junction just past the Vernal Fall Footbridge, take Segment D, the John Muir Trail, to the right | - | - |
| Hit Clark's Point as either sunrise or sunset begins. Check out the glorious light on Grizzly Peak, Mt. Broderick, and Liberty Cap looming over you. Now at the Clark's Point junction, take Segment F, to the right | 7-8am | 5:30-6:30pm |
| Arrive at Nevada Falls for sunrise (glinting off the waters) or sunset (reflecting on the fall). Don't forget to scramble down to the edge of the falls and look down the sheer drop! | 8-9am | 7:30-8:30pm |
| Continue along Segment H for a good relaxing break from elevation gain | - | - |
| Day-trippers chill out at Little Yosemite Valley before the hard part begins. Backpackers set up camp, eat dinner, and get your day packs ready for tomorrow! | 9-10am | 9:30-10:30pm |
| Begin Segment I up to Half Dome, winding through the forest at its backside. Midway along, there will be a turn off to the rest of John Muir Trail or Cloud's Rest or Tuolumne; keep left! | 9-10am | 3-4am |
| Emerge above the tree line. You are now at the sub dome! The scenery is pretty outstanding even here with snowy peaks in every direction on the horizon. This is where hitchhikers might try to snag an open permit with another group on the way up | - | - |
| Day-trippers at the end of Segment I get your permit checked. Backpackers, the ranger will not be here so early, and will check you on the way down. | - | - |
| Start Segment J with 500 ft/ 152 m of narrow switchbacks on granite steps flanked by knobbly pines | 10-11am | 4-5am |
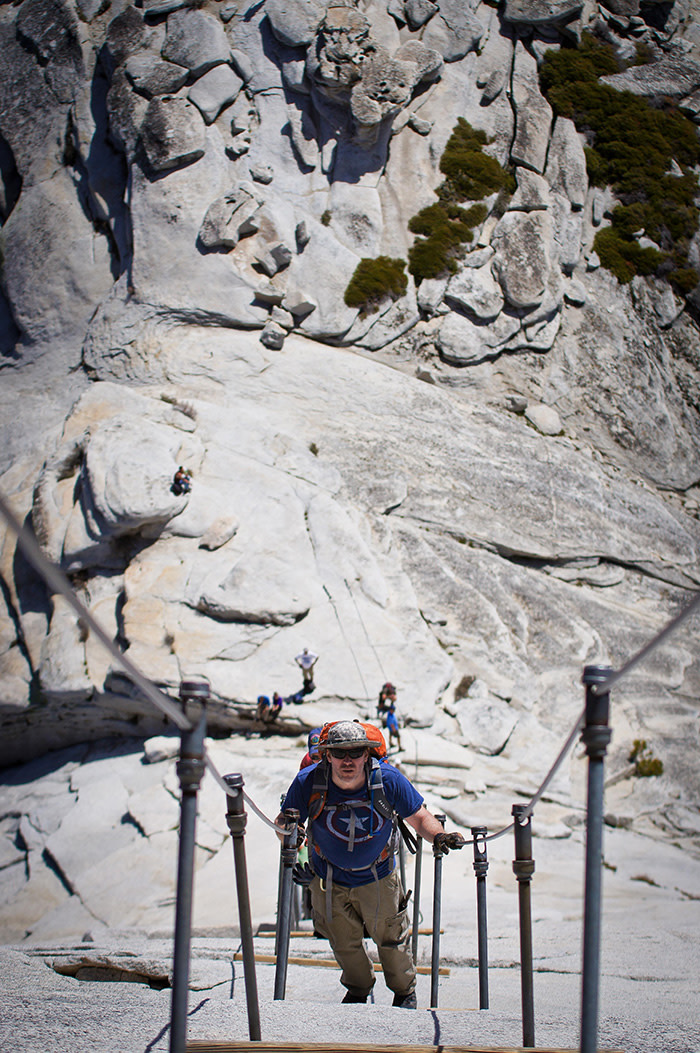
| The final 400 ft/ 122 m of Segment J are the infamous cables. Protips: it's easiest to walk between the cables with one hand on each and your feet moving sideways or at an angle (to minimize downward slide). The wooden planks about 10 ft/ 3 m apart provide good platforms for rest. This last stretch will totally depend on your personal comfort and fitness levels (see some more tips in the Hike Preparation section) | - | - |
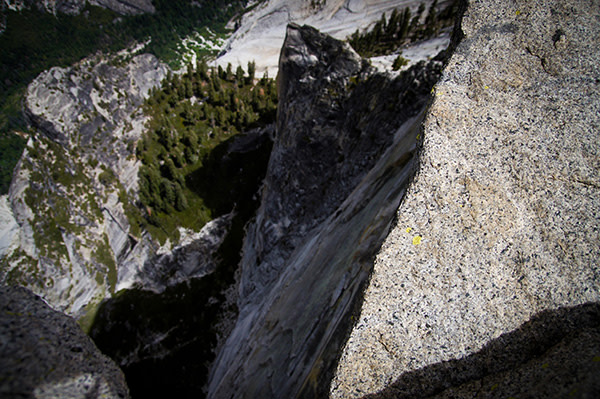
| Top out at Half Dome! The summit is surprisingly expansive in all directions, it'll be easy for you to find a private spot to enjoy lunch or breakfast and a nap! Before you leave, don’t forget to check out the “Iron board”/ “Surf board” to the right after you top out on the cables. This is an overhung rock where classic photos of daredevils dangling their legs over the valley nearly a mile below can be taken. Sometimes you can see climbers with their portaledges camped out below you. If you’re lucky, one might pop up while you’re there! | 11-12pm | 5-6am |
| Bid your farewells to Half Dome and check that off your bucket list. Descend back down through Segment J. Both day-trippers and backpackers will need to get their permits checked on the way down again | 1-2pm | 7-8am |
| Continue your descent down Segment I. Backpackers, return to Little Yosemite Valley, breakdown camp and pack up | - | - |
| Continue down Segment H. At the junction before Nevada Fall, take Segment G down another series of steep rocky step-based switchbacks to the base of Nevada Fall with great views as you descend | 2-3pm | 8:30-9:30am |
| Continue through Segment C pass Vernal Fall. Be careful on the way down; the steps are large and often wet from the spray. Take your time and mind any crowds; the Mist Trail is one of the most popular trails in the Valley! | - | - |
| Finish back at the start, shuttle stop 16. You did it! Time for a big, celebratory dinner or lunch! | 4-5pm | 11-12pm |
Other notes on Route Planning:
- If you are backpacking, there are multiple routes to get to Half Dome (e.g., from Tuolumne Meadows or from Glacier Point) with multiple other scenic vistas and time frames (e.g., you can spend a night at Cloud’s Rest and watch sunrise over Half Dome before summiting it). Here we focus on the popular path from Happy Isles.
- These routes are focused on the summer season. In the winter, hiking Half Dome is not officially recommended, as the cables will be down. If you go in the winter, Segments C & F are closed.
- We have rated difficulty based on generally fit & healthy people who walk a few miles as a regular part of their daily routine, but may not exercise much on top of that.
- There are various differences across guides on exact lengths and elevation due to hiking technique, different points of measuring (e.g., to the top of the waterfall vs. to the next trail junction), etc.

Physical fitness
When doing any long and strenuous day hike, the most important thing is to be aware of your personal fitness, capabilities, and limits. We believe that even if you don’t follow an exercise regime, as long as you walk as part of your routine (e.g., to and from work), and are a generally healthy person, you should be fine to do the Half Dome trail in its entirety (you just might be more sore than someone who exercises regularly or has trained for the hike). And even if you are an extremely slow hiker (as I personally am) with an average 1-mile per hour speed, you can finish in a day with an early enough start. As a reference point, I have seen people do the entire trail both as a day-tripper and a backpacker with literally no experience; and people who have trained for months.
Key questions to as yourself:
- How fast do you want to go and finish?
- Do you want to really work out your muscles or just enjoy the scenery?
- How much weight will you be carrying?
- How sore do you want to be at the end?
If you’d like to train, do a couple 10+ mile day hikes at other parks with elevation gain, interspersed with regular walking (a mile or so a day). For where to go, check out our protip on great places to backpack in the Bay Area. Beginners to backpacking may want to train with weight the pack will add 10-20 pounds to your back. Again I can’t emphasize this enough: being self-aware is the most important thing.
Suggested gear list
| Category | Item | Day-tripper | Backpacker |
|---|---|---|---|
| Food: weight will be a big consideration for long hikes, and while water is necessary, food is less so (fill up before & after!) | Meals | Optional | Recommended |
| Snacks & bars | Recommended | Recommended | |
| Water: you'll note on the map one drinking foutain past the Vernal Fall Footbridge at the end of Segment B, but that's a mile in so not very helpful. Know how much you drink! For most it will be at least 4 liters. | Water and/or water purification system | Either a purifier with a 2-3 liter bottle, OR 6 liters at start | Either a purifier with a 2-3 liter bottle, OR 8 liters at start (remember water for cooking!) |
| Hygiene: there are plenty of restrooms along the trail so most hikers will be fine. | Toilet paper | Optional | Optional |
| Shovel | Optional | Optional | |
| Cable safety: this will totally depend on your comfort level. Note that there may be a collection of (very nice) gloves people have tossed aside at the base of the cables if you don't mind using those | Gloves | Optional | Optional |
|
Harness & system to connect harness with cable (read more) |
Optional | Optional | |
| Trail safety: Note that day-trippers will largely be in the company of other hikers, regardless of when in the day you start | Headlamp | Optional | Recommended |
| Sun protection | Recommended | Recommended | |
| First aid kit | Optional | Recommended |
Obviously backpackers will need to bring other supplies for camp (e.g., bear can for food, tent, sleeping bag, sleeping pad, etc.). Remember that Last Minute Gear rents all the backpacking gear you will need, and we're the only shop that rents ultralight camping equipment!
Hazards
Hazards exist but can be easily avoided with advanced preparation (hence our gear list above!):
- Bring enough sustenance for the entire trip
- Avoid doing the Half Dome trail (and even the Mist Trail) when there’s a high chance of rain or wet conditions
- Avoid the cables when there’s a risk of lightning or when the cables are down in the off season
- Spend an additional day in the Valley before driving home
- If you have the potential for altitude sickness, spend a day in the Valley (or in Little Yosemite Valley) in advance to acclimate yourself, walk slowly, and bring extra water (most people are fine with the altitude gain)
- Remember bear safety
Of course we have to talk about hiking the cabled portion, which gets most people most nervous. Have there been fatalities? Yes, but only 6 since the cables were erected in 1919 (the last in 2011). Hike carefully, don’t horseplay, respect others’ right of way, go at your own pace (however slow it might be, no one is rushing you!), and you’ll be fine.
